

Article: How to Install the YardSauna Forest 3-Person Infrared Sauna
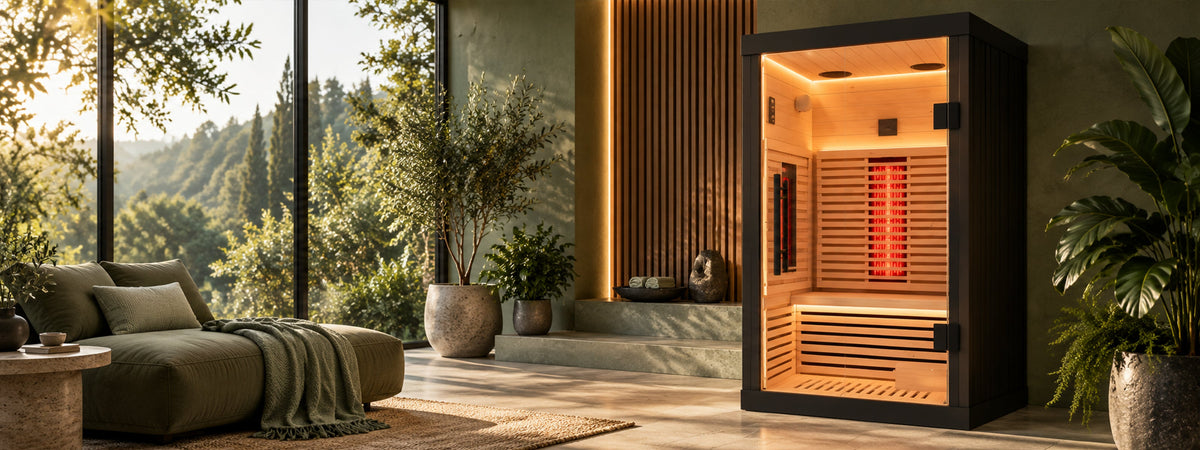
How to Install the YardSauna Forest 3-Person Infrared Sauna
Installing a home infrared sauna can feel like a big project, but with the right preparation, the YardSauna Forest 3-Person Infrared Sauna goes from crate to cozy sanctuary in under an hour. This guide walks you through every step—choosing the perfect spot, assembling the tongue-and-groove panels, wiring the dedicated circuit, and enjoying your first session—so you can sweat with confidence and zero guesswork.
Why the YardSauna Forest 3-Person Infrared Sauna Is a Smart Choice for Homeowners
Before we dive into installation, let's talk about what makes this particular sauna worth the effort. The YardSauna Forest 3-Person Infrared Sauna is a spacious, full-spectrum infrared cabin designed for up to three adults. It combines high-output quartz heaters with ultra-low EMF carbon panels to create a surround-body warmth that many users find more comfortable than traditional saunas that blast hot air. The wide 60-inch bench seats three comfortably, making it ideal for families or couples who want to share the experience.
Built from 100% non-toxic Canadian Hemlock, this sauna is both beautiful and durable. Hemlock is naturally resistant to warping and cracking, and it emits a subtle, pleasant aroma when warmed. The panoramic tempered glass front wall adds a modern, open feel, while the digital touch console, Bluetooth audio, and ambient LED lighting make it easy to customize your session. Plus, the extended tourmaline floor heater warms your feet—a detail many sauna owners overlook but quickly appreciate.
One of the standout features is the wide-format overhead red light and NIR array. Unlike many infrared saunas that only heat from the sides or back, the Forest 3 includes overhead panels that deliver red light and near-infrared wavelengths across all three seating spots. This design aims to provide more even coverage and a more immersive experience. And because it's UL/ETL/CE/ISO 9001 certified, you can trust that it meets rigorous safety standards.
Now, let's get into the nitty-gritty of installation. Whether you're a seasoned DIYer or a first-time sauna owner, this guide will help you avoid common pitfalls and get your sauna up and running safely.
Planning Your Sauna Placement: Location, Location, Location
The first and most important step is deciding where your sauna will live. The YardSauna Forest 3-Person Infrared Sauna measures 60 inches wide, 45 inches deep, and 75 inches high (152.4 x 114.3 x 190.5 cm). That's a footprint of about 5 by 3.75 feet, but you'll need extra clearance around it for assembly, ventilation, and comfortable entry. A good rule of thumb is to leave at least 6 inches of space on all sides, plus enough room in front to open the door fully.
Indoor vs. Outdoor Placement
This sauna is designed for indoor use. The natural Canadian Hemlock is not weatherproof, and the electrical components require a dry, climate-controlled environment. Basements, spare bedrooms, home gyms, and large bathrooms are all popular choices. Avoid placing it in a damp, unheated garage or an uncovered outdoor area, as moisture and temperature swings can damage the wood and electronics.
If you're considering a covered porch or sunroom, you'll need to ensure the space stays dry and within a reasonable temperature range year-round. Even then, the manufacturer's warranty may not cover outdoor placement, so check the documentation before committing.
Flooring and Support
The sauna weighs a few hundred pounds when assembled, so it needs a solid, level floor. Concrete, tile, hardwood, or luxury vinyl plank all work well. Avoid thick carpet, which can compress unevenly and make the sauna wobble. If you must place it on carpet, use a rigid plywood base cut slightly larger than the sauna's footprint to distribute the weight. The sauna's floor heater is built into the base, so you don't need a separate floor mat, but you should ensure the floor underneath is clean and free of debris that could scratch it.
Ventilation and Airflow
Infrared saunas don't produce steam, so you won't need a bathroom-style exhaust fan, but adequate airflow is still important. The Forest 3 has a multi-speed fresh-air ventilation system built in, but the room itself should have some air exchange. A window that opens or a nearby HVAC vent is ideal. Avoid placing the sauna in a tiny, windowless closet, as the air can become stale and uncomfortably warm.
Proximity to Electrical Panel
The sauna requires a dedicated 220V-240V circuit, which means you'll need to run wiring from your electrical panel to the sauna's location. The shorter the run, the less expensive the installation. If your panel is in the basement and you want the sauna on the second floor, expect higher electrician fees. Plan the location with this in mind.
Pro tip: Before you buy, have a licensed electrician assess your panel's capacity and the feasibility of running a dedicated circuit to your preferred spot. This can save you from a costly surprise later.
Preparing for Delivery and Unboxing
The YardSauna Forest 3-Person Infrared Sauna ships in several large, heavy boxes. You'll want to have a clear path from the delivery truck to the final location. If you're placing it in a basement, measure doorways, stairwells, and corners to ensure the panels can be maneuvered. The panels are modular and designed to fit through standard doorways, but the glass front wall is large and requires careful handling.
When the boxes arrive, inspect them for damage before signing the delivery receipt. Note any dents, tears, or crushed corners. Open the boxes and check that all parts are present using the included inventory list. If anything is missing or damaged, contact the seller immediately—don't start assembly until you have all the pieces.
You'll need a few basic tools: a rubber mallet, a Phillips screwdriver, and possibly a step stool or ladder for the roof panels. The assembly uses tongue-and-groove connections and cam locks, so no power tools are required. Two adults can complete the assembly in 45-60 minutes, but a third person can make it even easier, especially when lifting the roof and glass panels.
Step-by-Step Assembly Guide
Now for the fun part—putting it all together. The YardSauna Forest 3 uses a modular design with tongue-and-groove panels that lock together. Follow these steps carefully, and you'll have a solid, beautiful sauna in under an hour.
- Lay out all panels and hardware. Organize the panels by type: floor, walls, roof, bench, and glass. Identify the front, back, left, and right panels. The instructions will have diagrams—study them before you start.
- Assemble the floor base. Place the floor panel on the prepared surface. It should sit flat and level. Some models have adjustable feet; if so, adjust them now to eliminate any wobble.
- Attach the back wall panel. Lift the back panel and align its bottom edge with the floor's groove. Gently tap it into place with the rubber mallet. It should stand upright on its own, but you may want a helper to hold it steady.
- Attach the side walls. One at a time, position each side panel against the back panel and floor. The tongue-and-groove edges should slide together. Use the mallet to seat them fully. Secure the panels with the provided cam locks or screws, following the instructions.
- Install the front wall and glass door. The front panel includes the panoramic tempered glass wall. This is the heaviest and most fragile piece, so handle it with care. Align it with the side panels and floor, then secure it. The door may be pre-hung or need to be attached, depending on the model.
- Place the bench and heater panels. Inside the sauna, install the bench seat. It should rest on supports or brackets. Then position the heater panels—the quartz and carbon emitters—in their designated spots. The Forest 3 has heaters on the back, sides, and under the bench, plus the overhead red light array. Connect the wiring harnesses according to the color-coded plugs.
- Install the roof panel. With two people, lift the roof panel and set it on top of the walls. It should fit snugly into the grooves. Secure it with the provided fasteners. Make sure the overhead light array is properly connected.
- Connect the electrical components. Inside the sauna, you'll find the main control box and wiring for the heaters, lights, and Bluetooth audio. Plug everything in as shown in the manual. Double-check that all connections are tight and no wires are pinched.
- Final check and cleanup. Wipe down the interior with a dry cloth to remove any sawdust. Test the door to ensure it opens and closes smoothly. Step back and admire your work—you've just built a sauna!
Assembly is straightforward, but if you're not comfortable with wiring or lifting heavy panels, consider hiring a handyman. The electrical connection to your home's power supply, however, must be done by a licensed electrician—more on that next.
Electrical Requirements: What You Need to Know
The YardSauna Forest 3-Person Infrared Sauna runs on 220V-240V, not standard 120V household current. This means you'll need a dedicated circuit installed by a licensed electrician. Do not attempt to plug it into a regular outlet or use an adapter—doing so can damage the sauna and create a fire hazard.
Here's what the electrician will need to do:
- Install a dedicated 220-240V circuit from your electrical panel to the sauna location. The exact amperage will be specified in the sauna's manual, but it's typically 20-30 amps.
- Use appropriate gauge wiring (usually 10 or 12 AWG) and a suitable breaker.
- Install a disconnect switch near the sauna, as required by local code.
- Connect the sauna's power cord or hardwire it, depending on the model. The Forest 3 comes with a power cord that plugs into a matching outlet, but some installations may hardwire it directly.
- Ensure the circuit is properly grounded and protected by a GFCI if required by code.
Before the electrician arrives, have the sauna fully assembled and in its final position. That way, they can run the wiring to the exact spot and connect it safely. The cost of electrical work varies by region and complexity, but expect to pay a few hundred dollars for a straightforward installation. It's a small price for peace of mind.
Never attempt to wire the sauna yourself unless you are a qualified electrician. Infrared saunas draw significant power, and improper wiring can lead to overheating, electrical shock, or fire. Always follow local building codes and obtain any necessary permits.
First-Time Use: Setting Up and Breaking In Your Sauna
Once the sauna is assembled and electrically connected, it's time for the exciting part—your first session. But before you hop in, take a few minutes to set things up properly.
Initial Cleaning and Odor
New saunas often have a slight odor from the wood and manufacturing residues. Wipe down the interior with a damp cloth (water only, no harsh chemicals) and let it air out for a few hours. Some users run the sauna empty at a low temperature for 30 minutes to burn off any residual smells. This is normal and will fade after a few uses.
Understanding the Controls
The Forest 3 features a digital touch console that lets you adjust temperature, session time, and lighting. The full-spectrum heating matrix includes quartz and carbon emitters, and you can often control them separately. The overhead red light and NIR array may have its own setting. Spend a few minutes familiarizing yourself with the controls before your first session.
The Bluetooth audio system pairs with your phone or tablet, so you can listen to music, podcasts, or guided meditations while you relax. The ambient LED lighting can be set to a soothing color or turned off entirely.
Your First Session
Start with a shorter session—10 to 15 minutes—at a moderate temperature, around 110-120°F (43-49°C). Infrared saunas heat your body directly, so you may not feel as hot as in a traditional sauna, but you'll still sweat. Drink a glass of water before and after, and listen to your body. If you feel dizzy or uncomfortable, step out and cool down.
Over time, you can increase the duration and temperature to your preference. Many users enjoy 30-40 minute sessions at 120-140°F (49-60°C). The wide bench allows you to sit upright, recline, or even lie down if you're alone. The tourmaline floor heater warms your feet, which many find especially soothing.
Remember, the sauna is for relaxation and personal wellness. There's no need to push yourself to extremes. Consistency matters more than intensity.
How the YardSauna Forest 3 Infrared Heating System Works
To get the most out of your sauna, it helps to understand how it heats. Unlike traditional saunas that warm the air to 180°F or more, infrared saunas use infrared light to heat your body directly. The Forest 3 uses a surround full-spectrum heating matrix that combines two types of emitters: high-output quartz heaters and ultra-low EMF carbon panels.
Quartz heaters produce near-infrared and mid-infrared wavelengths that penetrate the skin more deeply, creating a warming sensation from within. Carbon panels emit far-infrared waves that are absorbed by the skin's surface, providing a gentle, enveloping heat. Together, they create a balanced, full-body warmth that many users find more comfortable than the intense air heat of a traditional sauna.
The overhead red light and NIR array adds another dimension. Red light and near-infrared light are studied for their potential effects on skin and muscle recovery, though research is ongoing. In the sauna, these wavelengths provide a subtle, warming glow that complements the other heaters. The extended tourmaline floor heater ensures your feet stay warm, which is often the coldest part of the body in a sauna.
The digital touch console lets you fine-tune the experience. You can adjust the temperature, set a timer, and control the intensity of different heater zones. The multi-speed ventilation system pulls in fresh air to prevent the space from becoming stuffy, while the Bluetooth audio and LED lighting create a personalized ambiance.
Because the sauna operates at lower temperatures than a traditional sauna, it uses less energy and is more comfortable for longer sessions. The ultra-low EMF design means the electromagnetic fields are kept to a minimum, which is a consideration for some users.
Common Mistakes to Avoid When Installing Your Sauna
Even with a well-designed product like the YardSauna Forest 3, installation mistakes can happen. Here are the most common pitfalls and how to steer clear of them.
- Skipping the electrical planning. Assuming you can plug the sauna into a standard outlet is a recipe for disaster. Always have a licensed electrician install a dedicated 220-240V circuit before you assemble the sauna.
- Ignoring floor leveling. An uneven floor can cause the sauna to rock, which stresses the joints and can lead to cracking over time. Use shims or a leveling compound to create a flat, stable base.
- Forgetting about clearance. Placing the sauna too close to walls or furniture can restrict airflow and make it hard to access the back panels for maintenance. Leave at least 6 inches of clearance on all sides.
- Rushing the assembly. Trying to force panels together or skipping steps can damage the tongue-and-groove edges. Take your time, follow the instructions, and use a rubber mallet gently.
- Neglecting ventilation. While infrared saunas don't produce steam, they do generate heat. A room with no airflow can become uncomfortably warm and humid. Ensure the room has some ventilation, and use the sauna's built-in fan.
- Not testing before first use. After assembly, turn on the sauna and let it run for 10-15 minutes while you watch for any error codes, unusual smells, or loose connections. It's easier to fix a problem now than after you're settled in.
By avoiding these mistakes, you'll ensure a smooth installation and years of reliable use.
Practical Tips and a Pre-Installation Checklist
Here's a quick checklist to run through before your sauna arrives. Print it out or save it on your phone.
- Measure the space: Confirm the sauna's dimensions (60"W x 45"D x 75"H) and add clearance. Check doorways and stairwells for delivery.
- Choose the location: Indoor, dry, level floor, near a window or vent, close to the electrical panel if possible.
- Hire an electrician: Get a quote for a dedicated 220-240V circuit. Schedule the work for after assembly.
- Prepare the floor: Clean and level the area. If on carpet, cut a plywood base.
- Gather tools: Rubber mallet, Phillips screwdriver, step stool, and a helper.
- Clear the path: Remove obstacles from the delivery route to the final spot.
- Read the manual: Familiarize yourself with the parts list and assembly steps before starting.
- Plan for disposal: Keep the boxes and packing materials until you're sure you don't need to return anything.
Following this checklist will save you time and headaches on installation day.
Buyer Considerations: Is the YardSauna Forest 3 Right for You?
Before you commit to the YardSauna Forest 3-Person Infrared Sauna, consider a few factors. First, space: do you have a room that can accommodate a 5 by 3.75 foot footprint with clearance? Second, electrical: are you willing to invest in a dedicated circuit? Third, budget: while the sauna itself is a significant investment, the electrical work and any floor preparation add to the total cost.
On the plus side, the Forest 3 offers a spacious interior that seats three adults comfortably, making it a great choice for families or couples. The full-spectrum heating matrix provides a more even and customizable warmth than basic carbon-only saunas. The overhead red light and NIR array is a unique feature that sets it apart from many competitors. And the non-toxic Canadian Hemlock construction ensures a clean, healthy environment.
If you're looking for a high-quality, feature-rich infrared sauna that's relatively easy to install, the Forest 3 is a strong contender. Its modular assembly means you can have it up and running in under an hour, and the UL/ETL/CE/ISO 9001 certifications give you confidence in its safety and durability.
For those who want a more compact option or a traditional steam sauna, you might explore other models. But for a 3-person infrared sauna with full-spectrum heating and premium features, the YardSauna Forest 3 is hard to beat.
Real-World Examples: How Homeowners Use Their Forest 3 Sauna
To give you a sense of what to expect, here are a few scenarios based on common use cases.
The Family Wellness Hub: A family of four places the sauna in their finished basement, next to a home gym. After workouts, they take turns using it for 20-minute sessions. The wide bench allows two kids to sit together, and the Bluetooth audio lets them play their favorite playlists. The parents appreciate the low EMF design and the tourmaline floor heater that keeps everyone's feet warm.
The Couple's Retreat: A couple installs the sauna in a spare bedroom converted into a relaxation room. They use it in the evenings to unwind, often with the LED lights set to a soft blue and a guided meditation playing through the speakers. The overhead red light array is a favorite feature, as they feel it adds an extra layer of warmth and relaxation.
The Solo Athlete: A marathon runner places the sauna in a corner of the garage (with proper insulation and climate control). After long runs, they use the sauna for 30 minutes at a moderate temperature, focusing the heat on their legs. The quartz heaters provide deep, penetrating warmth that they find soothing for tired muscles.
These examples illustrate the versatility of the Forest 3. Whether you're sharing it with family or enjoying it solo, it adapts to your needs.
Maintenance and Care for Longevity
Your YardSauna Forest 3 is built to last, but a little maintenance goes a long way. Here are some simple tips to keep it in top shape.
- Wipe down the interior after each use with a dry or slightly damp cloth to remove sweat and oils.
- Avoid using harsh chemicals or abrasive cleaners on the wood. A mild soap and water solution is fine for occasional deep cleaning.
- Leave the door open for 15-20 minutes after use to allow moisture to evaporate.
- Check the electrical connections periodically to ensure they are tight and free of corrosion.
- If the wood starts to look dry, you can apply a food-grade mineral oil or a sauna-specific wood treatment. Follow the manufacturer's recommendations.
- Keep the glass door clean with a standard glass cleaner, but avoid spraying directly on the wood frame.
With proper care, your sauna will provide years of enjoyable use.
Conclusion: Your Path to a Home Sauna Sanctuary
Installing the YardSauna Forest 3-Person Infrared Sauna is a straightforward project that most homeowners can tackle in a single afternoon. With its modular tongue-and-groove panels, two adults can assemble it in 45-60 minutes, and the only professional help you'll need is a licensed electrician for the dedicated 220-240V circuit. The result is a beautiful, feature-rich sauna that offers full-spectrum infrared warmth, overhead red light therapy, and a spacious bench for up to three people.
From choosing the perfect spot to enjoying your first session, this guide has covered everything you need to know. The Forest 3's non-toxic Canadian Hemlock construction, ultra-low EMF heating, and premium features like Bluetooth audio and LED lighting make it a standout choice for any home. Whether you're seeking relaxation, a post-workout recovery ritual, or a cozy spot to unwind with loved ones, this sauna delivers.
Remember, the information in this article is for informational purposes only. Always consult the manufacturer's manual and a qualified electrician for specific installation requirements. With a little planning and care, you'll be enjoying your own home sauna sanctuary in no time.
Frequently Asked Questions
1. Do I need a professional to install the YardSauna Forest 3-Person Infrared Sauna?
The physical assembly can be done by two adults with basic tools—no professional needed. However, the electrical connection requires a licensed electrician to install a dedicated 220-240V circuit. Do not attempt to wire it yourself.
2. Can I place the sauna on carpet?
It's not recommended to place the sauna directly on thick carpet, as it can compress unevenly and cause the sauna to wobble. Use a rigid plywood base cut slightly larger than the sauna's footprint to distribute the weight evenly.
3. How long does assembly take?
With two adults, assembly typically takes 45-60 minutes. The tongue-and-groove panels and cam locks are designed for quick, tool-free assembly. Having a third person can speed up the process, especially when lifting the roof and glass panels.
4. What are the electrical requirements for the sauna?
The sauna requires a dedicated 220-240V circuit, typically 20-30 amps. A licensed electrician must install the circuit, wiring, and a suitable outlet or hardwire connection. It cannot be plugged into a standard 120V outlet.
5. Can I use the sauna outdoors?
No, the YardSauna Forest 3 is designed for indoor use only. The Canadian Hemlock wood and electrical components are not weatherproof. Placing it outdoors or in an unheated, damp space will void the warranty and risk damage.
6. How much clearance do I need around the sauna?
Leave at least 6 inches of clearance on all sides for ventilation and access to the back panels. In front, ensure enough room for the door to open fully and for users to enter and exit comfortably.
7. What is the temperature range of the sauna?
The sauna can reach temperatures up to about 140°F (60°C), though many users prefer 110-130°F (43-54°C) for infrared sessions. The digital console allows precise temperature control.
8. Is the sauna difficult to move once assembled?
Yes, once assembled, the sauna is heavy and bulky. It's best to choose its permanent location before assembly. If you must move it, you'll need several strong helpers and possibly to disassemble it partially.
9. How do I clean the sauna?
Wipe down the interior with a dry or slightly damp cloth after each use. For deeper cleaning, use a mild soap and water solution, then dry thoroughly. Avoid harsh chemicals and abrasive scrubbers. The glass door can be cleaned with standard glass cleaner.
10. Can I listen to music in the sauna?
Yes, the Forest 3 features high-fidelity Bluetooth acoustic audio. Pair your phone or tablet to play music, podcasts, or guided meditations through the built-in speakers. The digital console also controls LED lighting for ambiance.
11. What is the warranty on the YardSauna Forest 3?
Warranty details vary, so check the product documentation or contact the seller for specifics. Typically, the sauna is covered for a limited period against defects in materials and workmanship, but improper installation or outdoor use may void it.
12. How many people can use the sauna at once?
The sauna is designed for up to three adults, with a wide 60-inch bench that seats three comfortably. For a more spacious experience, two people can stretch out or recline.
For more on low-EMF home infrared saunas and the models we offer, visit yardsauna.com.
This article is for informational purposes only and does not constitute medical advice. Always consult a qualified healthcare provider before starting any new wellness routine, especially if you have pre-existing conditions or are pregnant.