

YardSauna Forest 1-Person Infrared Sauna Setup Guide: Step-by-Step Installation for Your Home
Transforming a corner of your home into a private wellness retreat is easier than you might think. The YardSauna Forest 1-Person Infrared Sauna arrives as a compact, modular kit that two adults can assemble in under an hour with basic tools. This guide walks you through every step—from choosing the right spot and meeting electrical needs to unboxing, assembling, and enjoying your first session.
Why Choose a 1-Person Infrared Sauna for Your Home?
Infrared saunas have surged in popularity among American homeowners seeking convenient, low-maintenance wellness solutions. Unlike traditional steam saunas that heat the air, infrared saunas use light waves to warm your body directly. This allows for lower ambient temperatures—typically between 120°F and 140°F—while still promoting a deep, satisfying sweat. Many users report that infrared sessions feel more tolerable for longer periods, making them ideal for daily routines.
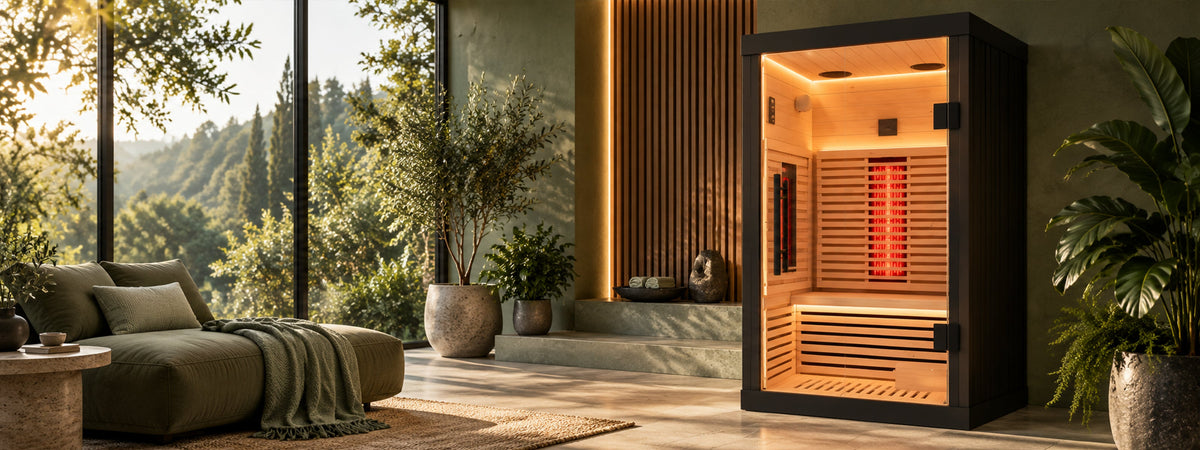
The YardSauna Forest 1-Person Infrared Sauna stands out for its compact 36-inch by 36-inch footprint, which fits easily into bedrooms, home gyms, basements, or even large closets. Despite its small size, it delivers full-spectrum heating through rapid-heating quartz elements and ultra-low EMF carbon panels. This combination provides near, mid, and far infrared wavelengths, covering a broad range of potential benefits from surface-level skin revitalization to deeper muscle warmth.
For households with limited square footage, a one-person unit eliminates the need for a dedicated sauna room. You can place it against a wall, in a corner, or even under a standard 8-foot ceiling. The natural Canadian Hemlock construction is non-toxic and emits a subtle, pleasant aroma, while the tempered glass front adds a modern aesthetic that blends with most home decors.
Pre-Installation Planning: Placement, Electrical, and Preparation
Before your sauna arrives, take time to plan the installation. Rushing this phase often leads to costly mistakes, such as placing the unit in a damp area or discovering that your electrical outlet is insufficient. A little foresight ensures a smooth setup and years of trouble-free operation.
Choosing the Ideal Location
The best spot for your infrared sauna is a dry, well-ventilated indoor space with a level floor. Avoid areas prone to moisture, such as bathrooms with poor exhaust fans or unfinished basements with water seepage. While infrared saunas produce minimal humidity compared to steam saunas, you will still sweat, so good airflow helps prevent musty odors.
Consider proximity to a dedicated 120-volt outlet. The YardSauna Forest requires a standard 15-amp household circuit, but it must be dedicated—meaning no other major appliances share that circuit. Running an extension cord is not recommended; instead, plan to place the sauna within 6 to 10 feet of the outlet so the included power cord reaches comfortably.
Think about privacy and convenience. A bedroom corner or home gym offers solitude, while a basement might provide more space and cooler ambient temperatures. Ensure there is at least 6 inches of clearance on all sides for ventilation and easy access to the control panel. The sauna's door swings outward, so leave enough room to enter and exit comfortably.
Electrical Requirements and Safety
The YardSauna Forest 1-Person Infrared Sauna operates on 120 volts and draws up to 15 amps. Most modern homes have 15-amp or 20-amp circuits, but the key is that the circuit must be dedicated—no other outlets or appliances should be on it. If you are unsure, consult a licensed electrician to verify the circuit and install a new one if necessary.
Never plug the sauna into a power strip, surge protector, or extension cord. These devices can overheat and create a fire hazard. The sauna should be plugged directly into a grounded, three-prong outlet. If your home has older two-prong outlets, have an electrician upgrade them before installation.
For added safety, consider installing a ground fault circuit interrupter (GFCI) outlet, though it is not strictly required for indoor saunas. GFCI protection is especially wise if the sauna is near a water source, though we recommend keeping it away from sinks and showers altogether.
Gathering Tools and Preparing the Space
You will need a Phillips screwdriver, a rubber mallet, a level, and possibly a step stool. The sauna panels are tongue-and-groove, so they fit together snugly without nails or glue. Clear the installation area of furniture and debris, and lay down a protective mat or cardboard to prevent floor scratches during assembly.
Check the package contents against the included manual before starting. The YardSauna Forest ships in several boxes containing wall panels, floor and ceiling panels, the heater assemblies, the glass door, and hardware. Unpack everything and organize the parts by type to streamline the process.
Step-by-Step Assembly Guide for the YardSauna Forest
Assembling the YardSauna Forest is a straightforward process that two adults can complete in 45 to 60 minutes. The modular design uses interlocking panels, so no special skills are required. Follow these steps carefully, and refer to the included manual for detailed diagrams.
- Lay the floor panel. Start by placing the floor panel on the level surface where the sauna will sit. Ensure the panel is oriented correctly, with the heater connection ports facing upward. Use a level to confirm it is even; shim if necessary.
- Attach the back wall panel. Lift the back wall panel and align its bottom edge with the floor panel's groove. Gently tap it into place with a rubber mallet. The panel should stand upright on its own, but a helper should hold it steady.
- Install the side wall panels. Attach the left and right side panels one at a time, sliding them into the floor grooves and locking them to the back panel via the tongue-and-groove edges. Use the mallet to seat them firmly.
- Mount the front frame and door. The front frame includes the tempered glass door. Align it with the side panels and floor, then secure it using the provided screws or cam locks. Check that the door swings freely and the latch engages properly.
- Place the ceiling panel. Lift the ceiling panel and set it onto the assembled walls. It should drop into place and interlock with the top edges. Press down firmly to ensure a tight seal.
- Connect the heater assemblies. Inside the sauna, locate the heater panels on the back and side walls. Connect the wiring harnesses according to the color-coded plugs—these are designed to prevent incorrect connections. Secure any loose wires with the included clips.
- Install the control panel and accessories. Mount the digital touch controller on the exterior or interior as specified. Attach the overhead red light and NIR therapy panel, and place the tourmaline-enriched floor foot heater in its designated spot. Plug in the Bluetooth speaker module if separate.
- Final checks and power-up. Inspect all connections, ensure no wires are pinched, and plug the sauna into the dedicated outlet. Turn on the main power switch and test the control panel, lights, and heater before first use.
Take your time during assembly. Rushing can lead to misaligned panels or loose connections. If a panel does not fit easily, do not force it—check for obstructions or reversed orientation. The tongue-and-groove system is precise, so a little patience goes a long way.
Understanding the Heating Technology and How It Works
The YardSauna Forest uses a combination of quartz full-spectrum heaters and ultra-low EMF carbon panels to deliver a comprehensive infrared experience. Understanding how these components work together helps you optimize your sessions and appreciate the engineering behind the sauna.
Full-Spectrum Infrared: Near, Mid, and Far
Infrared light is divided into three categories based on wavelength: near-infrared (NIR), mid-infrared (MIR), and far-infrared (FIR). Each penetrates the body to different depths and is associated with different effects. Near-infrared, the shortest wavelength, is absorbed by the skin's surface and is often used in red light therapy for skin revitalization. Mid-infrared penetrates slightly deeper, targeting muscles and joints. Far-infrared, the longest wavelength, reaches deepest and is primarily responsible for raising core body temperature and inducing sweat.
The YardSauna Forest's quartz elements emit near and mid-infrared, while the carbon panels focus on far-infrared. This full-spectrum approach ensures that your entire body receives a balanced dose of infrared energy. The quartz heaters heat up rapidly—often reaching full output within minutes—while the carbon panels provide consistent, even warmth across a larger surface area.
Ultra-Low EMF Design
Electromagnetic fields (EMF) are a concern for many sauna users. The YardSauna Forest is engineered to minimize EMF emissions from its heating elements and wiring. The carbon panels are designed with shielding to reduce EMF to ultra-low levels, well below typical household appliances. This makes the sauna a suitable choice for those who are sensitive to electromagnetic exposure or simply prefer a cleaner environment.
Overhead Red Light and NIR Therapy
In addition to the wall heaters, the YardSauna Forest includes an overhead panel that emits red light and near-infrared therapy. Red light in the 600-700 nanometer range is often used in skincare routines, as some studies suggest it may support collagen production and skin health. The NIR component penetrates slightly deeper, potentially aiding in muscle recovery. While individual results vary, many users report a pleasant warming sensation and improved skin tone with regular use.
Tourmaline-Enriched Floor Foot Heater
The floor of the sauna contains a tourmaline-enriched heating element that warms your feet. Tourmaline is a mineral that, when heated, emits far-infrared radiation and negative ions. This helps maintain even heat distribution from your feet to your core, preventing the cold-feet sensation common in some saunas. The foot heater also adds a gentle, grounding warmth that enhances overall comfort.
First Use: Preparing for Your Inaugural Session
Once your sauna is assembled and powered on, it is tempting to jump right in. However, a few preparatory steps will ensure a safe and enjoyable first experience. Follow this checklist to get the most out of your new YardSauna Forest.
- Preheat the sauna. Turn on the sauna and set the temperature to your desired level (typically 120-140°F). Allow 15-20 minutes for the heaters to reach full output. The quartz elements heat quickly, but the carbon panels take a bit longer to stabilize.
- Hydrate before and after. Drink a glass of water before entering, and keep a water bottle nearby. Infrared saunas induce profuse sweating, so replenishing fluids is essential. Avoid alcohol or heavy meals immediately before a session.
- Start with a shorter session. For your first time, limit your session to 10-15 minutes. This allows your body to acclimate to the heat. Gradually increase the duration in subsequent sessions as you become more comfortable.
- Wear minimal clothing or a towel. Infrared heat penetrates clothing, but bare skin absorbs it most effectively. Many users prefer to sit on a towel for hygiene and comfort. The sauna's bench is smooth hemlock, but a towel adds a layer of softness.
- Use the Bluetooth speakers and LED lighting. Pair your phone with the built-in Bluetooth speakers and select calming music or a podcast. Adjust the ambient linear LED lighting to your preferred color and brightness to create a relaxing atmosphere.
- Ventilate as needed. The sauna has multi-speed cabin ventilation. If you feel too warm or the air becomes stuffy, open the vent slightly to allow fresh air in. This is especially useful during longer sessions.
- Cool down gradually. After your session, exit the sauna slowly and sit in a cool area for a few minutes. A lukewarm shower can help rinse off sweat, but avoid cold plunges immediately after, as your body temperature is elevated.
Consistency matters more than intensity. Many sauna enthusiasts find that a daily 20-30 minute session at a moderate temperature yields better long-term results than occasional marathon sessions at maximum heat.
Common Mistakes to Avoid During Setup and Use
Even with clear instructions, first-time sauna owners can make errors that affect performance or safety. Here are the most frequent pitfalls and how to steer clear of them.
1. Placing the Sauna on an Uneven or Unstable Floor
An uneven floor can cause the panels to warp or the door to misalign. Always check the floor with a level before assembly. If the floor is not perfectly flat, use shims under the floor panel to create a stable base. Avoid placing the sauna on thick carpet, which can compress unevenly and trap moisture.
2. Using an Extension Cord or Power Strip
As mentioned earlier, the sauna must be plugged directly into a dedicated outlet. Extension cords and power strips are not rated for the continuous high amperage draw and can overheat, posing a fire risk. If your outlet is too far, have an electrician install a new one closer to the sauna location.
3. Skipping the Dedicated Circuit Requirement
Plugging the sauna into a shared circuit with other appliances can trip the breaker or cause voltage drops that damage the heaters. Ensure the circuit is dedicated—only the sauna should be on it. If you are unsure, check your breaker panel or consult an electrician.
4. Forcing Panels During Assembly
The tongue-and-groove panels are designed to fit snugly, but forcing them can crack the wood or damage the edges. If a panel does not slide in easily, check for debris in the groove or misalignment. Gently tap with a rubber mallet, never a metal hammer.
5. Neglecting Ventilation
While infrared saunas do not produce steam, they do generate heat and sweat. Without adequate ventilation, the interior can become stuffy and odors can linger. Use the built-in ventilation fan during and after sessions, and leave the door slightly ajar for a few minutes after use to air out the cabin.
6. Overdoing It on the First Session
Some new users are eager to experience a deep sweat and stay in too long. This can lead to lightheadedness, dehydration, or overheating. Start with 10-15 minutes and gradually increase. Listen to your body—if you feel dizzy or nauseous, exit immediately and cool down.
Practical Tips and a Pre-Installation Checklist
To ensure a seamless setup, use this checklist before your sauna arrives. It covers the essential preparations and helps you avoid last-minute surprises.
- Measure your space. Confirm that the 36x36-inch footprint fits with at least 6 inches of clearance on all sides. Check ceiling height—the sauna is 75 inches tall, so a standard 8-foot ceiling is more than adequate.
- Verify the electrical circuit. Locate a dedicated 120V/15A outlet near the intended spot. If none exists, schedule an electrician to install one before delivery.
- Clear the path. Ensure the delivery route from your front door to the installation room is wide enough for the boxes. The sauna ships in multiple packages, each weighing up to 100 pounds, so plan for two people to move them.
- Prepare the floor. Clean the area and, if desired, place a moisture-resistant mat under the sauna. This protects the floor from any minor spills or sweat drips.
- Gather tools. Have a Phillips screwdriver, rubber mallet, level, and step stool ready. A cordless drill with a Phillips bit can speed up screw installation but is not required.
- Read the manual. Skim the included assembly guide before starting. Familiarize yourself with the parts list and diagrams to avoid confusion mid-build.
- Plan for disposal. Keep the packaging until you are certain all parts are present. Break down boxes for recycling after assembly.
Following this checklist minimizes downtime and ensures that your sauna is up and running on the same day it arrives. Most homeowners report that the entire process, from unboxing to first use, takes under two hours.
Buyer Considerations: Is the YardSauna Forest Right for You?
Before committing to any sauna, it is wise to evaluate your needs, budget, and space. The YardSauna Forest 1-Person Infrared Sauna excels in several areas, but it may not be the perfect fit for everyone. Here is an honest look at its strengths and limitations.
Pros of the YardSauna Forest
- Compact footprint. At 36x36 inches, it fits in spaces where larger saunas cannot. This makes it ideal for apartments, condos, or homes without a dedicated wellness room.
- Full-spectrum heating. The combination of quartz and carbon heaters provides a broader range of infrared wavelengths than many budget saunas, which often use only carbon panels.
- Low EMF. The ultra-low EMF design is a significant advantage for health-conscious users who want to minimize electromagnetic exposure.
- Quick assembly. The tongue-and-groove modular panels allow two adults to assemble the sauna in under an hour, with no special tools or skills required.
- Added features. Bluetooth speakers, LED lighting, and a digital touch controller enhance the user experience and make sessions more enjoyable.
- Certifications. The sauna is UL/ETL/CE/ISO 9001 certified, providing assurance of safety and quality standards.
Cons to Consider
- Single-person capacity. If you plan to share the sauna with a partner or friend, this model will not accommodate two people comfortably. Consider a larger 2-4 person model if social sauna sessions are important.
- No built-in chromotherapy. While the LED lighting offers ambient colors, it is not a dedicated chromotherapy system. If color therapy is a priority, you may need to add external lights.
- Requires dedicated circuit. The 15-amp dedicated circuit requirement may necessitate electrical work if your home lacks a suitable outlet. This adds to the overall installation cost.
- Temperature ceiling. Infrared saunas typically max out around 140°F, which is lower than traditional steam saunas. If you crave extreme heat, a traditional sauna might be a better fit.
For most solo users seeking a convenient, low-maintenance infrared sauna, the YardSauna Forest offers an excellent balance of performance, features, and price. Its compact size and easy assembly make it a practical choice for first-time sauna owners.
Maintenance and Long-Term Care
Keeping your YardSauna Forest in top condition requires minimal effort but pays off in longevity and performance. Follow these simple maintenance practices to protect your investment.
Cleaning the Interior
After each session, wipe down the bench and backrest with a dry or slightly damp cloth to remove sweat. Avoid harsh chemical cleaners, which can damage the hemlock wood and leave residues that vaporize when heated. For deeper cleaning, use a mild soap solution and rinse with a damp cloth, then dry thoroughly.
The tempered glass door can be cleaned with a standard glass cleaner. Avoid abrasive sponges that could scratch the surface. The floor foot heater should be kept free of debris; a soft brush or vacuum attachment works well.
Preventing Odors
To keep the sauna smelling fresh, leave the door open for 15-20 minutes after each session to allow moisture to evaporate. If odors develop, place a small bowl of baking soda inside overnight to absorb them. Avoid using scented oils or air fresheners inside the sauna, as they can leave residues on the wood and heaters.
Inspecting Electrical Connections
Every few months, unplug the sauna and inspect the power cord and plug for signs of wear or damage. Check the internal wiring connections to ensure they remain tight. If you notice any frayed wires or loose connections, discontinue use and contact a qualified technician.
Wood Care
The Canadian Hemlock is naturally resistant to decay and insects, but it benefits from occasional conditioning. You can apply a thin coat of food-grade mineral oil to the interior wood surfaces once or twice a year to maintain their luster and prevent drying. Avoid varnishes or polyurethane, which can emit fumes when heated.
Real-World Setup Examples and Scenarios
To illustrate how the YardSauna Forest fits into different homes, consider these common scenarios. Each highlights a unique placement or usage pattern that might inspire your own setup.
Scenario 1: The Bedroom Corner Retreat
Sarah, a busy professional, placed her sauna in the corner of her master bedroom. The compact footprint left plenty of room for her bed and dresser. She uses the sauna each evening before bed, pairing her phone to the Bluetooth speakers for a guided meditation. The low EMF design gives her peace of mind, and the gentle warmth helps her unwind after long workdays.
Scenario 2: The Basement Gym Addition
Mark, a fitness enthusiast, installed his sauna next to his home gym equipment in the basement. The dedicated outlet was already present for his treadmill, so no electrical work was needed. He uses the sauna after workouts to relax his muscles and enjoys the overhead red light therapy for skin recovery. The multi-speed ventilation keeps the basement air fresh.
Scenario 3: The Small Apartment Solution
Emily lives in a 600-square-foot apartment and thought a sauna was out of reach. She placed the YardSauna Forest in a walk-in closet that she converted into a wellness nook. The sauna's 75-inch height fit perfectly under the closet's ceiling, and the door opened outward into the bedroom. She uses a small fan to circulate air after sessions, and the compact size means she can still use the closet for storage above the sauna.
These examples show that with a little creativity, almost any home can accommodate a one-person infrared sauna. The key is to prioritize a dedicated circuit, level floor, and adequate ventilation.
Comparing the YardSauna Forest to Other Infrared Sauna Types
When shopping for an infrared sauna, you will encounter various configurations, including portable blankets, two-person cabins, and custom-built rooms. Understanding the differences helps you appreciate the YardSauna Forest's niche.
Portable Infrared Sauna Blankets
Sauna blankets are affordable and take up no floor space, but they do not provide the same immersive experience as a cabin. You lie inside a heated bag, which can feel claustrophobic and does not heat your head or face. The YardSauna Forest, by contrast, surrounds you with infrared heat from all sides, including overhead, for a more complete session.
Two-Person and Larger Cabins
Larger saunas offer more room to stretch out or share with a partner, but they require more floor space and often a higher electrical capacity. The YardSauna Forest's one-person design is ideal for solo users who want a dedicated personal retreat without sacrificing a whole room.
Custom-Built Sauna Rooms
Custom saunas can be tailored to any space and include traditional steam heating, but they are expensive and time-consuming to build. They also require professional installation, including framing, insulation, and specialized electrical work. The YardSauna Forest arrives pre-fabricated and ready to assemble, offering a fraction of the cost and effort.
For most homeowners, a pre-built infrared sauna like the YardSauna Forest strikes the best balance between performance, convenience, and price. Its full-spectrum heating and low EMF design put it ahead of many competitors in the same category.
Expert Tips for Maximizing Your Infrared Sauna Experience
Once your sauna is set up, these tips from experienced users can help you get the most out of every session. Incorporate them gradually to find what works best for your body and schedule.
- Time your sessions strategically. Morning sessions can energize you for the day, while evening sessions promote relaxation. Experiment to see which works better for your circadian rhythm.
- Use the red light therapy consistently. The overhead red light and NIR panel is most effective when used regularly. Aim for at least 3-4 sessions per week to see potential skin benefits over time.
- Stay hydrated with electrolytes. Sweating depletes not just water but also minerals. Consider adding an electrolyte supplement to your post-sauna water to replenish sodium, potassium, and magnesium.
- Incorporate stretching or meditation. The sauna is an excellent place for gentle stretching or mindfulness practice. The heat relaxes muscles, making stretches more effective, and the quiet environment aids meditation.
- Clean the sauna regularly. A quick wipe-down after each session prevents buildup and keeps the wood looking new. This small habit extends the life of your sauna significantly.
- Monitor your body's response. Pay attention to how you feel during and after sessions. If you experience any discomfort, reduce the temperature or duration. Some users find that alternating between hot and cool environments enhances the experience.
Remember that individual responses to infrared heat vary. What works for one person may not work for another, so be patient and adjust your routine as needed.
Closing Summary: Your Path to a Personal Wellness Retreat
Setting up a home infrared sauna does not have to be complicated. With careful planning, a dedicated electrical circuit, and a couple of hours of assembly, you can enjoy the benefits of full-spectrum infrared heat in the comfort of your own home. The YardSauna Forest 1-Person Infrared Sauna is an excellent choice for solo users who value compact design, low EMF, and versatile heating options. Its rapid-heating quartz elements and ultra-low EMF carbon panels deliver deep, even warmth, while the overhead red light and NIR therapy panel add a skin-revitalizing dimension. The tourmaline-enriched floor foot heater ensures your feet stay warm, and the tongue-and-groove assembly makes setup a breeze.
Whether you place it in a bedroom corner, a basement gym, or a converted closet, the YardSauna Forest fits seamlessly into your lifestyle. With proper maintenance and mindful use, it can provide years of relaxing, rejuvenating sessions. This guide is for informational purposes only and does not constitute medical advice. Always consult a qualified professional for health-related concerns.
Frequently Asked Questions
1. What size infrared sauna fits a small home?
The YardSauna Forest 1-Person Infrared Sauna has a footprint of 36 inches by 36 inches, making it suitable for bedrooms, home gyms, basements, and even large closets. It requires only about 9 square feet of floor space, plus a few inches of clearance on each side for ventilation. This compact size allows it to fit in spaces where larger saunas cannot.
2. Do I need a dedicated electrical circuit for the YardSauna Forest?
Yes, the sauna requires a dedicated 120-volt, 15-amp circuit. This means no other appliances or outlets should share the circuit. Using a shared circuit can trip the breaker or cause voltage drops that damage the heaters. If you do not have a dedicated circuit, hire a licensed electrician to install one.
3. Can I plug the sauna into a regular household outlet?
You can plug it into a standard grounded three-prong outlet, but that outlet must be on a dedicated 15-amp circuit. Avoid using extension cords, power strips, or surge protectors, as they are not rated for the continuous high amperage draw and can overheat. The sauna's power cord is designed to plug directly into the wall outlet.
4. How long does it take to assemble the YardSauna Forest?
Two adults can typically assemble the sauna in 45 to 60 minutes. The tongue-and-groove modular panels fit together without nails or glue, and the included manual provides clear step-by-step diagrams. No special tools are required beyond a Phillips screwdriver and a rubber mallet.
5. What is the maximum temperature of the YardSauna Forest?
The sauna can reach temperatures up to approximately 140°F (60°C), which is typical for infrared saunas. The digital touch controller allows you to set your desired temperature, and the quartz heaters heat up quickly. Many users prefer temperatures between 120°F and 130°F for comfortable sessions.
6. Is the YardSauna Forest safe for daily use?
Yes, the sauna is designed for daily use. Many owners use it once or twice a day without issues. However, it is important to stay hydrated, limit sessions to 30-40 minutes, and listen to your body. If you have any medical conditions, consult your healthcare provider before starting a sauna routine.
7. Does the sauna require any special flooring?
No special flooring is required, but the floor should be level and dry. The sauna can be placed on hardwood, tile, laminate, or low-pile carpet. If placing on carpet, use a moisture-resistant mat underneath to protect the carpet from any sweat drips or spills.
8. How do I clean the interior of the sauna?
Wipe down the bench, backrest, and walls with a dry or slightly damp cloth after each session to remove sweat. For deeper cleaning, use a mild soap solution and rinse with a damp cloth, then dry thoroughly. Avoid harsh chemicals, abrasive sponges, and scented cleaners that can damage the wood or leave residues.
9. Can I use the sauna if I have a pacemaker or other medical device?
If you have a pacemaker, defibrillator, or other implanted medical device, consult your physician before using an infrared sauna. The electromagnetic fields and heat may interfere with some devices. Always err on the side of caution and seek professional medical advice.
10. What is the warranty on the YardSauna Forest?
The YardSauna Forest comes with a manufacturer's warranty that covers defects in materials and workmanship. The specific terms and duration may vary, so refer to the product documentation or contact customer support for details. Registering your sauna after purchase can help streamline any warranty claims.
11. Does the sauna produce a lot of EMF?
No, the YardSauna Forest is engineered to produce ultra-low EMF levels. The carbon panels are shielded to minimize electromagnetic emissions, and the wiring is designed to reduce EMF. This makes it a suitable choice for users who are concerned about EMF exposure.
12. Can I use the sauna outdoors?
The YardSauna Forest is designed for indoor use only. Placing it outdoors exposes it to moisture, temperature extremes, and pests, which can damage the wood and electrical components. If you want an outdoor sauna, look for models specifically built for outdoor conditions.
For more on low-EMF home infrared saunas and the models we offer, visit yardsauna.com.
This article is for informational purposes only and does not constitute medical advice. Always consult a qualified healthcare provider before starting any new wellness routine, especially if you have pre-existing conditions or are pregnant.