

Sauna Ventilation Guide: Keep Your Home Sauna Fresh and Dry
You have just unboxed a beautiful new infrared sauna, and the last thing you want is a stuffy, humid box that smells like a gym locker. Proper ventilation is the silent hero that keeps your sauna sessions crisp, your wood pristine, and your home free from excess moisture. In this guide, we will walk through exactly how to ventilate a home sauna, with a special focus on the YardSauna Forest 3-Person Infrared Sauna, so you can enjoy years of clean, comfortable heat.
Why Sauna Ventilation Matters More Than You Think
Many first-time sauna owners assume that a sauna is just a hot box, and that sealing it up tight is the goal. In reality, a sauna is a living space that needs to breathe. Without proper airflow, carbon dioxide from your own breath builds up quickly in a small, hot room. You may feel heavy, drowsy, or even get a headache, even though the thermometer says the temperature is perfect. Fresh air intake and exhaust are essential for comfort and safety.
Beyond comfort, ventilation is critical for the longevity of your sauna and your home. After each session, the warm, moist air inside the cabin needs somewhere to go. If it lingers, it condenses on cooler surfaces, soaking into the wood and creating a breeding ground for mold and mildew. Over time, this can warp the wood, cause musty odors, and even damage the surrounding room. A well-ventilated sauna dries out quickly and stays clean.
Infrared saunas like the YardSauna Forest operate at lower temperatures than traditional steam saunas, but they still produce significant moisture through sweat. The Forest model features a multi-speed fresh-air ventilation system built in, which is a great starting point. However, understanding how to use that system, and when to add additional venting, will make your sauna experience dramatically better.
How Sauna Ventilation Works: The Fresh-In, Used-Out Principle
The golden rule of sauna ventilation is simple: fresh air in, used air out, no recirculation. You want to bring oxygen-rich air from outside the sauna into the cabin, and you want to send the hot, humid, CO2-laden air out of the sauna and out of your house. Recirculating indoor air just evens out the temperature without fixing the air quality, and exhausting into your attic or a closed room can cause serious moisture problems.
In a traditional sauna, this is achieved with three vents: an intake vent near the heater, an exhaust vent on the opposite wall near the benches, and a drying vent high on the wall for after the session. Infrared saunas, which heat the body directly rather than the air, still benefit from the same principles, though the placement may be adjusted. The YardSauna Forest comes with a multi-speed ventilation fan that helps move air through the cabin, but you can enhance it with passive vents if needed.
Think of your sauna like a chimney: cool, fresh air enters low, warms up, rises through the seating area, and exits high. This natural convection loop is the foundation of good ventilation.
The Three Vents and Their Jobs
A properly ventilated sauna uses three different vents, each with a specific role. The intake vent is placed near the heater, ideally a little above it, so that fresh air mixes into the rising hot plume and circulates around the room without creating a draft. The exhaust vent is on the opposite wall, roughly at the level of the upper and lower benches, so that the warm air passes through the seating zone before leaving. The drying vent is placed high on the wall and is opened after the session to let moisture escape.
For an infrared sauna like the Forest, the built-in ventilation fan serves as the active exhaust, pulling air through the cabin. You can also crack a window in the room or install a small passive vent in the sauna wall if you find the air getting stale. The key is to avoid opening the sauna door during a session as a way to 'ventilate' - that just dumps all your heat and humidity and makes the heater work harder.
Why CO2 Buildup Is the Real Enemy
In a small, sealed room, your breathing alone can raise CO2 levels to uncomfortable concentrations within 20-30 minutes. High CO2 makes you feel tired, foggy, and short of breath, which is the opposite of the invigorating sauna experience you want. Proper ventilation keeps CO2 low and oxygen high, so you can relax and enjoy the heat. This is especially important if you use the sauna after a workout, when your body is already demanding more oxygen for recovery.
Many sauna users report that a well-ventilated sauna feels 'lighter' and more comfortable, even at the same temperature. That is because the air is fresh, not because the thermometer changed. The YardSauna Forest's multi-speed fan lets you adjust the airflow to your preference, so you can find the sweet spot between too stuffy and too drafty.
Ventilating the YardSauna Forest 3-Person Infrared Sauna: A Step-by-Step Guide
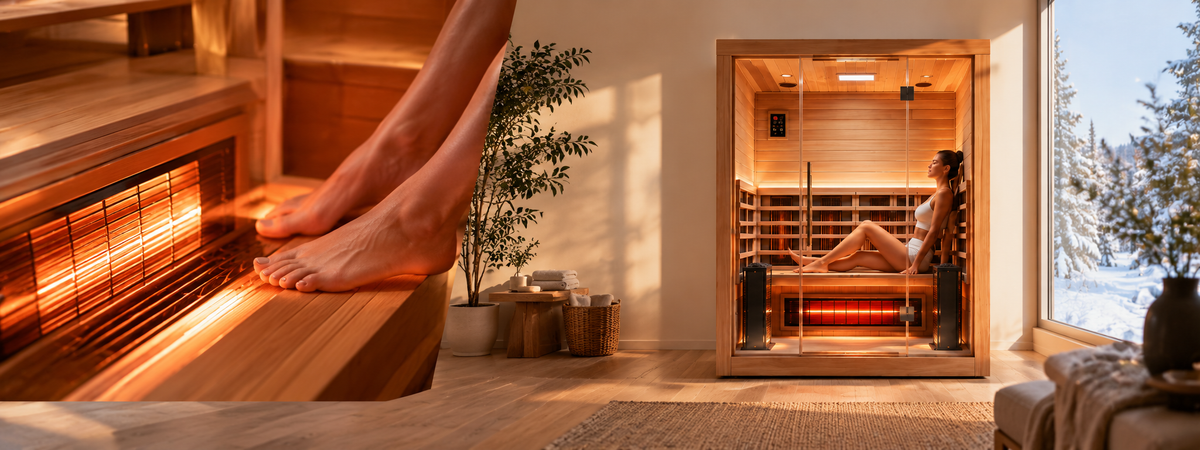
The YardSauna Forest is a spacious 3-person infrared sauna with a surround full-spectrum heating matrix, a wide-format overhead red light and NIR array, and an extended tourmaline floor heater. It is built from 100% non-toxic Canadian Hemlock and features a panoramic tempered glass front wall, Bluetooth audio, and a digital touch console. Its multi-speed fresh-air ventilation is designed to keep the air moving, but you can optimize it further with these steps.
- Start with the built-in fan on low. When you first get in, turn the ventilation fan to its lowest setting. This creates a gentle air exchange without cooling you down. As the session progresses and you start to sweat, you can increase the fan speed if the air feels heavy.
- Position the sauna in a well-ventilated room. Do not shove the sauna into a tiny closet with no airflow. The room around the sauna needs to be able to supply fresh air to the intake and accept the exhaust. A spare bedroom, basement, or large bathroom with a window or vent is ideal.
- Add a passive intake vent if needed. If you find the sauna gets stuffy even with the fan on high, you may need to add a small passive vent near the floor on the wall opposite the fan. This allows fresh air to be drawn in as the fan exhausts. A simple 4-inch vent cover works well.
- Use the drying vent after every session. Once you are done, open the sauna door and turn the fan on high for 10-15 minutes, or leave the door ajar and let the residual heat dry the interior. If your sauna has a dedicated drying vent, open it fully. This prevents moisture from soaking into the wood.
- Wipe down surfaces. After the sauna has cooled slightly, use a clean, dry towel to wipe down the benches, backrest, and floor. This removes excess sweat and speeds up drying. Avoid using harsh chemicals; a damp cloth with mild soap is fine for occasional deep cleaning.
- Monitor humidity in the room. If you notice condensation on windows or walls in the room after a sauna session, you need more ventilation. Consider running a dehumidifier in the room, or installing a bathroom-style exhaust fan that vents outside.
By following these steps, you will keep your Forest sauna fresh, dry, and ready for the next session. The multi-speed fan is a great feature, but it works best when paired with a little common sense about airflow.
Common Ventilation Mistakes That Ruin Saunas
Even well-intentioned sauna owners make mistakes that lead to stuffy air, mold, or wasted energy. Here are the most common pitfalls and how to avoid them.
- Sealing the sauna too tightly. Some people think a sauna should be airtight to hold heat. In reality, you need a small amount of air exchange to keep oxygen levels up. The Forest's ventilation fan is there for a reason - use it.
- Opening the door during a session. It is tempting to crack the door when you feel too hot, but that dumps all the heat and humidity you have built up. Instead, lower the temperature on the digital console or turn down the heater intensity.
- Exhausting into the house without a plan. If you vent the sauna's exhaust into a closed room, that moisture will condense on walls and ceilings, leading to mold. Always exhaust to the outdoors, or to a bathroom with a fan that vents outside.
- Ignoring the drying phase. After your session, the sauna is full of warm, moist air. If you just close the door and walk away, that moisture will soak into the wood. Always air out the sauna for at least 10-15 minutes after use.
- Placing the sauna in a damp basement without a dehumidifier. Basements are naturally humid, and adding a sauna can push the humidity over the edge. Use a dehumidifier in the room to keep the overall moisture level in check.
- Using the wrong type of vent. A cheap plastic vent cover can warp or melt in the heat. Use metal or high-temperature plastic vents designed for saunas. The Forest's built-in fan is already heat-rated, so you only need to worry about any additional vents you add.
Avoiding these mistakes will save you from headaches down the road. Remember, ventilation is not about making the sauna cold; it is about making the air fresh and dry.
Buyer Considerations: What to Look for in a Ventilated Infrared Sauna
When shopping for an infrared sauna, ventilation features are often overlooked in favor of heater type, size, and aesthetics. But a sauna that cannot breathe will never be comfortable, no matter how fancy the heaters are. Here is what to look for.
First, check if the sauna has a built-in ventilation fan. The YardSauna Forest includes a multi-speed fresh-air ventilation system, which is a huge plus. This allows you to actively pull fresh air through the cabin and exhaust stale air, rather than relying on passive convection alone. A multi-speed fan gives you control over the airflow, so you can adjust it based on the number of people in the sauna and the ambient temperature.
Second, consider the sauna's construction and sealing. A well-built sauna with tight tongue-and-groove panels will hold heat better, but it also needs a controlled way to let air in and out. The Forest's modular panels are designed to fit together snugly, and the ventilation fan provides the necessary air exchange. Avoid saunas that are completely sealed with no venting options, as you will end up drilling holes yourself.
Third, think about the room where you will place the sauna. A sauna in a small, windowless room will need more active ventilation than one in a large, open space. The Forest's dimensions of 60'W x 45'D x 75'H make it suitable for many rooms, but you should ensure there is at least a few inches of clearance around it for air to circulate. Also, the sauna requires a dedicated 220V-240V circuit, so plan the electrical work accordingly.
Finally, look for materials that resist moisture. The Forest is built from 100% non-toxic Canadian Hemlock, which is naturally resistant to decay and warping. Hemlock is a great choice for saunas because it holds up well to repeated heating and cooling cycles, and it does not off-gas harmful chemicals. Combined with proper ventilation, this wood will last for decades.
Practical Tips and a Ventilation Checklist for Home Sauna Owners
Here is a quick checklist to keep your sauna ventilation in top shape. Print it out and stick it near your sauna if you like.
- Run the ventilation fan on low during every session, and increase speed if the air feels heavy.
- After each session, open the door and run the fan on high for 10-15 minutes to dry the interior.
- Wipe down benches and floor with a dry towel after the sauna has cooled.
- Check the room for condensation after a session; if you see water on windows, add more ventilation or a dehumidifier.
- Inspect the sauna's vents and fan regularly for dust or debris, and clean as needed.
- If you add a passive vent, place it near the floor on the wall opposite the fan for best cross-flow.
- Never vent the sauna exhaust into an attic, crawlspace, or closed room; always go outside.
- Consider the number of users: more people means more moisture and CO2, so increase ventilation accordingly.
These simple habits will keep your sauna fresh and extend its life. The Forest's multi-speed fan makes it easy to adjust on the fly, so you can always find the right balance.
Real-World Example: Ventilating a Forest Sauna in a Small Home Office
Imagine you have a spare bedroom that you use as a home office, and you decide to put your YardSauna Forest in the corner. The room is about 10x12 feet, with one window that opens. Here is how you would set up the ventilation.
First, you position the sauna so that the back wall (where the fan is located) faces the window, leaving about 6 inches of clearance. You keep the window cracked open during sauna sessions to supply fresh air to the room. Inside the sauna, you run the fan on low for solo sessions, and bump it to medium when your partner joins you. After each session, you open the sauna door fully, turn the fan on high, and open the window wider for 15 minutes. You also run a small dehumidifier in the room for an hour after the sauna to pull any residual moisture from the air. This setup keeps the room comfortable and prevents any musty smells.
This example shows that with a little planning, you can enjoy a sauna in almost any room. The key is to think about the entire air path: fresh air in from the window, through the sauna, and out via the fan and open window. The Forest's built-in fan does the heavy lifting, so you just need to manage the room's airflow.
Video Walkthrough: See Proper Sauna Ventilation in Action
In this on-camera guide, a Finnish sauna expert demonstrates the complete ventilation setup for a home sauna. He explains the three essential vents - intake, exhaust, and drying - and shows exactly where to place each one for optimal air flow. You will see how fresh air is drawn in near the heater, circulates through the seating area, and exits without creating drafts or cold spots.
The video also covers common mistakes, such as opening the door during a session or exhausting humid air into the house, and how to avoid them. The presenter emphasizes the importance of drying the sauna after each use to prevent mold and extend the life of the wood. This practical walkthrough is a great complement to the written guide above.
How to Ventilate Your Sauna - Complete 2026 Guide - Proper vent placement and drying tipsClosing Summary: Breathe Easy with the YardSauna Forest
Proper ventilation is the difference between a sauna that feels like a rejuvenating retreat and one that feels like a damp closet. By following the principles of fresh air in, used air out, and drying after every session, you can protect your investment and enjoy every moment inside. The YardSauna Forest 3-Person Infrared Sauna is designed with this in mind, featuring a multi-speed fresh-air ventilation system, 100% non-toxic Canadian Hemlock construction, and a spacious 60-inch bench for up to three adults. Its surround full-spectrum heating matrix, wide-format red light and NIR array, and extended tourmaline floor heater deliver complete warmth, while the digital touch console lets you fine-tune your session. With proper ventilation, this sauna will provide years of clean, comfortable heat for you and your family. This article is for informational purposes only.
Frequently Asked Questions
1. Do infrared saunas need ventilation?
Yes, infrared saunas still need ventilation. Even though they operate at lower temperatures than traditional saunas, your body still sweats, and your breath produces CO2. Without fresh air exchange, the cabin becomes stuffy and humid, which is uncomfortable and can lead to mold. The YardSauna Forest includes a built-in multi-speed fan for this purpose.
2. Where should the intake and exhaust vents be placed in a sauna?
In a traditional sauna, the intake vent goes near the heater, slightly above it, and the exhaust vent goes on the opposite wall at bench level. For an infrared sauna like the Forest, the built-in fan acts as the exhaust, and you can add a passive intake vent near the floor on the opposite side if needed. The goal is to create a cross-flow that passes through the seating area.
3. Can I vent my sauna into the house instead of outside?
It is not recommended to vent sauna exhaust into the house, as the hot, humid air can cause condensation and mold in walls and ceilings. If you must exhaust indoors, do so into a bathroom that has a mechanical exhaust fan venting outside. The best practice is to vent directly outdoors.
4. How long should I air out my sauna after a session?
You should air out your sauna for at least 10-15 minutes after each session. Open the door, turn the ventilation fan on high, and let the residual heat dry the interior. Wiping down surfaces with a dry towel also speeds up the process and prevents moisture from soaking into the wood.
5. What is the ideal humidity level inside a sauna?
Infrared saunas typically have lower humidity than traditional steam saunas, usually around 20-40%. You do not need to add steam; the moisture from your sweat is enough. If the humidity feels too high, increase the ventilation fan speed or add a dehumidifier to the room.
6. Can I use a regular bathroom exhaust fan for my sauna?
A bathroom exhaust fan can be used to ventilate the room where the sauna is located, but it should not be installed inside the sauna itself unless it is rated for high temperatures. The YardSauna Forest's built-in fan is designed for the sauna environment, so you only need to manage the room's airflow.
7. How does the multi-speed ventilation fan work on the YardSauna Forest?
The Forest's multi-speed fresh-air ventilation fan allows you to adjust the airflow from low to high using the digital touch console. On low, it provides a gentle air exchange without cooling the cabin; on high, it quickly removes humid air after a session. This gives you precise control over the sauna's atmosphere.
8. Will adding ventilation make my sauna colder?
Proper ventilation should not make your sauna noticeably colder. The intake air is warmed as it passes through the cabin, and the fan speed can be adjusted to minimize heat loss. If you feel a draft, lower the fan speed or adjust the vent position. The goal is fresh air, not cold air.
9. What is the best way to prevent mold in a home sauna?
To prevent mold, always dry the sauna thoroughly after each use: open the door, run the fan on high, and wipe down surfaces. Ensure the room has adequate ventilation or a dehumidifier. Avoid leaving wet towels inside the sauna, and periodically inspect the wood for any signs of moisture or discoloration.
10. Do I need a dedicated drying vent in an infrared sauna?
A dedicated drying vent is more common in traditional saunas, but the principle still applies. In an infrared sauna like the Forest, opening the door and running the fan on high after a session serves the same purpose. If you find the sauna stays damp, you can add a small high vent to help moisture escape.
11. Can I install the YardSauna Forest in a basement without windows?
Yes, you can install the Forest in a basement without windows, but you will need to pay extra attention to ventilation. Use a dehumidifier in the room, and consider adding a small exhaust fan that vents outside. The sauna's built-in fan will handle the cabin air, but the room itself needs to stay dry.
12. How often should I clean the ventilation fan and vents?
You should check the ventilation fan and vents every few months for dust and debris. Use a soft brush or vacuum attachment to clean the fan blades and vent covers. Keeping the airflow path clear ensures the fan works efficiently and prolongs its life.
For more on low-EMF home infrared saunas and the models we offer, visit yardsauna.com.
This article is for informational purposes only and does not constitute medical advice. Always consult a qualified healthcare provider before starting any new wellness routine, especially if you have pre-existing conditions or are pregnant.